Instagram

Wednesday 25 March 2015

Coconut Palm Sugar

Coconut Palm Sugar

As proponents of clean eating, we are always searching for healthier alternatives and substitutes for our recipes, without compromising on taste.

You may have noticed our recent Instagram showing what store cupboard items we had been replenishing. One of the items featured was organic coconut palm sugar, so here’s a little introduction:

Coconut palm sugar has become an attractive alternative to cane sugar due to its lower glycaemic index and high levels of micro-nutrients… and because it can be substituted directly (1:1) in baking. Hurrah!


What is Coconut Palm Sugar?

Coconut sugar is made from the sap of the coconut plant which is harvested by ‘tapping’ the blossoms of a coconut tree. A cut is made and the sap is collected as it flows, in to bamboo containers. The sap is around 80% water so this is evaporated and reduced to its chosen form, crystals or a paste.

It is less sweet than cane sugar but with a molasses-like, caramel flavour similar to brown sugar and doesn’t have an overpowering coconut taste as you might expect. Just as the flavours and colours of honey can vary depending upon the bees' diet; the colour, sweetness and flavour of coconut palm sugar can vary depending on the species, the season or location of harvest and the way the "sap" is reduced.

I don’t think we’re wrong in saying that sugar and sweeteners feature highly on most people’s “Things to eat less of” list and the glycaemic index of a sugar or sweetener is something to be aware of.


Glycaemic Index

Glycaemic Index (GI) is a measurement for carbohydrate-containing foods. All carbohydrates are not equal with respect to their immediate impact on our blood sugar. Typically, simple carbohydrates such as table sugar, syrup, fruit juice, are classed as having a ‘high-GI’ and are broken down quickly by your body, causing a more rapid increase in blood glucose. The “simpler” the structure is, the faster your body will digest and absorb that food. Complex carbohydrates such as vegetables, beans, grains, have more complex chemical structures which means the digestion and absorption process will be slower, causing a more gradual rise in blood sugar levels over time.

Whilst it is important to remember that you shouldn’t judge a sugar on its GI alone, (there are other health benefits, pitfalls and ethics to consider with different sugars and sweeteners) it is a good idea to be aware of what type of sugars and sweeteners you’re consuming.

Foods are categorised as low, medium or high GI:

Low GI: 0-55

Medium GI: 56-69

High GI: 70 or greater


A few common types of sugar substitutes used in baking, and their glycaemic indexes:

White Sugar – 80

Honey - 58

Maple Syrup – 54

Coconut Palm Sugar -35

Agave Syrup – 15


Swap and Drop

Regardless of what sugar you are using, in most recipes, you can decrease the amount called for by at least 1/3 – 1/2 without affecting the quality of the end product. This is a good place to start before you even think about swapping cane sugar for an alternative.

Aside from sweetness, cane sugar performs a multitude of roles in baking, such as liquefying –e.g. as cookies bake, helping them spread and adding to their texture, caramelising, nourishing yeast and stabilizing when whipping. If there is a delicate balance, swapping can pose some problems so pick your substitute appropriately and be prepared to adjust things. Liquid natural sweeteners like maple syrup, agave or honey not only taste multiple times sweeter than regular sugar further reducing the amount needed but you will also need to reduce the amount of liquid – roughly by around 1/5th (usually 2-3 tbsp) for its liquid state.


What’s your favourite sugar substitute? Have you found any award-winning combinations (coconut sugar in salt caramel, anyone?) and have you had any absolute disasters with your substitutions? (I’m looking at you polenta and pure stevia cake!)

Saturday 21 March 2015

Tuna Burgers with Spelt Buns, Pineapple Salsa and Garlic Sauce

In honour of International Happiness Day yesterday, I decided to make a dish that I have neglected for a while but one that brings me the greatest of happy memories.

My old flatmate and I used to eat these nearly every night during the winter and exhausted Finland's tuna stocks...they were perfect after a nice sauna and dip in the sea (yes, seriously). You can substitute the tuna for salmon or any other fish, as desired.

Tuna Burgers with Pineapple Salsa and Garlic Sauce

Super-Quick Spelt Burger Buns:

These are super quick to make- only 40 minutes from start to finish!

Ingredients:

500g Doves Farm Wholemeal Spelt Flour

2 tbsp Dried Yeast

1 egg

2 tbsp sugar

2 tsp salt

150ml olive oil

300ml warm water

Method:

In a large mixing bowl, dissolve the yeast in warm water. Leave to stand for 5 minutes before adding the sugar and olive oil. Stir and leave to sit for around 10 minutes.

Slowly add 1 beaten egg to the yeast mixture. Gradually add the flour and the salt. Mix until you have formed a dough. (Use your judgement and add extra water or flour where necessary - different types of flour often need more or less water).

Knead the dough for around 3 minutes.

Divide the dough evenly into balls around the size of the buns you want to make. You should be able to yield around 6 generous buns from this recipe.

Slightly squash each dough ball with the palm of your hand and place the dough balls on a baking tray covered with parchment. Cover with a damp tea towel and leave to rise in a warm place. We chuck ours in our drying room, but near a radiator also works well. Cooler temperatures mean the dough will take longer to rise.

As these are quick-buns, leaving them to rise for 15 minutes should be enough. You can of course leave them longer if you have time!

Bake in the oven at 180c for around 15 minutes and leave to cool on a rack before slicing.

The Tuna Burgers

When we originally made these, we didn’t have the luxury of a food processor. It was therefore a very hands on task. Either method works well so don’t panic if you don’t have any gadgets to put to good use.

Ingredients:

5 fresh Tuna steaks (frozen work well too- make sure they're from a sustainable source!)

1 tbsp Thai fish sauce

1 tbsp Soy sauce

Thumb-sized chunk of fresh ginger, grated

Large bunch of fresh coriander

1 green chilli, finely chopped

1 ripe avocado (a great way to use up just-a-tad-too-ripe-avocados!)

Spring onions (4-5)

4 limes

1 tsp coconut oil

By hand:

Shred the tuna steaks by ripping them apart with your hands. If you’re up for it, you can almost ‘mince’ the pieces by squeezing handfuls through your fingers. Add the avocado, chilli, the juice of 4 freshly squeezed limes, chopped spring onions, grated ginger, soy and fish sauce. Stir vigorously until it resembles mince.

When you’re happy with the consistency (it should be fine enough to hold together in patties but coarse enough so that there is some texture to every mouthful), leave to 'marinate' for as long as you have.

By machine:

Chuck all the ingredients into the food processor and pulse until minced.

Method:

Grab a handful of 'tuna mince' and shape into patties. As you get them into shape you may find that the marinade squeezes out -don't panic, your marinading time means the flavour will be retained! Aim for a yield of 6-8 burgers depending on size of tuna steaks and size of your burgers!

Place a shallow frying pan or griddle on to the hob, with a teaspoon of coconut oil. Carefully add the burgers to the pan, being mindful of the oil spitting.

Pan-fry each side of the burgers until golden brown - five minutes a side or so- or less depending on how well-done you like your tuna.

Pineapple Salsa

Ingredients:

Handful of fresh coriander

1 small green chilli

Juice of 1/2 lime

Method:

Using a mini-chopper, food processor, or your finely honed chopping skills, blitz the pineapple slices, lime juice, coriander and chilli together. Et voila!

Garlic Sauce (Aioli)

Ingredients:

3 cloves of garlic

Yoghurt*

Juice of 1/2 lime

*Creme fraiche, fromage blanc, fromage frais, smetana, greek yoghurt, quark, plain soya yoghurt (probably NOT the vanilla variety!) all work wonderfully well for this. Keep it natural is what I'd recommend.

I am a passionate hater of mayonnaise. I despise the stuff even though this is perhaps unfairly down to the world's obsession with adding a whole damn jar to one tiny sarnie! (ugh 'Tuna mayo' I am looking at you!)

Whilst there is technically nothing wrong with a good homemade mayonnaise, I prefer something lighter, and more in the yoghurty camp. By all means add lime juice and crushed garlic to your Hellman's but I guarantee using yoghurt will sway your taste-bud opinions and nutritionally be much more beneficial to your health *go probiotics!*

Method:

Simply crush 2-3 garlic cloves and add the juice of half a lime to whichever base you’ve opted for and mix!

Smoked Paprika Potato Wedges

While we're at it, I have a confession to make. I despise potatoes. I think they're romanticised, over-glamourised and in short- totally unnecessary. It seems I am in the minority though and as I am not one to deny others of their enjoyment, potatoes are still a feature in my kitchen. These are just as easy as oven chips, taste better and can be made using sweet potatoes *yay!*

Ingredients:

4 large potatoes (or sweet potatoes, as you prefer!)

Smoked Paprika

Salt and Pepper

2 tbsp Olive Oil or 2 tbsp of Coconut Oil

Method:

Pre-heat the oven to 250c.

Slice your potatoes into quarters, and for super large ones, eighths - make them, you know, wedge sized and shaped!

Bring a large pot of water to the boil and chuck your potato wedges in. Bring back to the boil for 8 minutes.

Drain in a colander and leave to 'steam' dry for a few minutes.

Place your par-boiled wedges on a baking tray and drizzle with the oil of your choosing (the sweet potato / coconut combo is my favourite)

Sprinkle with a few generous pinches of smoked paprika (see here) and some freshly ground black pepper.

Shuffle the tray to ensure the wedges are evenly coated and pop in the oven on a relatively high shelf for around 30 minutes, turning at least once.

Once golden brown and crispy, remove from the oven and place in a serving bowl with a good pinch of sea salt.

We served our burgers with spiralised organic beetroot and steamed asparagus with a drizzle of olive oil

Friday 20 March 2015

Spelt and Chia Crispbread

In Finland, crispbread is an integral part of every diet. Having lived there for over 6 years, I continue to get my crunch kicks in the form of cripsbreads and crackers and love to experiment with varieties of different seeds and multigrains.

Try these Spelt and Chia cripsbreads to take the edge off your hunger and satisfy your crunch cravings!

Ingredients:

150g Spelt Flour

100g Oats

25g Linseed

25g Chia Seeds

25g Sunflower Seeds

25g Sesame Seeds

2 tbsp Malt Extract

1 tsp Salt

2 tbsp Yeast

1 tbsp Olive Oil

Method:

Mix the yeast with 200 ml of warm water, add the oil and malt extract, and stir. Leave for 10 minutes or so, until it looks bubbly

Whilst you’re waiting for that magic to happen, whizz up the flour, oats and seeds. By all means, feel free to keep a handful of seeds back (or go crazy and use extra!) to press into the top of the crispbreads before baking!

Slowly add the liquid to the dry ingredients. Don’t go chucking it all in at once unless you’re down with having to add more flour. You don’t want your dough to be too sticky.

Roll out the dough and shape as preferred. You could use cookie cutters, or keep them rectangular. (I have an awesome embossed rolling pin that embosses hearts, ferns and stars on to my dough!) Aim for a thickness less than 0.5cm as they will ‘puff’ up slightly, and the thicker they are, the less crispy they will be!

If you’re adding extra seeds on top, sprinkle over your rolled out dough and then run your rolling pin over them to squish them in a bit and to stop the seeds from falling off!

Remember that when you bake biscuits etc. they continue to harden once you’ve removed them from the oven. You’ll need to bake low and slow to ensure maximum crispy-ness.

Try 150c for 20 minutes at least, until golden. Those who roll their dough more thinly might need less time, whereas thicker slices, a little longer. Be patient and keep your eye on them!

Once baked, remove from oven and cool on a rack.

Enjoy with your favourite nut butter or on their own for a most satisfying snack!

Thursday 19 March 2015

Clean Redux Challenge

We’ve all been there; you’re tired, the weather is rubbish, your credit card bill has arrived…and sometimes you just need a comfort food fix.

STOP RIGHT THERE!!!

Comfort doesn’t have to equal unwholesome or unhealthy. So we are giving you the opportunity to get @allaboutthekale to give your favourite questionably ‘healthy’ comfort food a makeover. A clean up!

Comment below stating what dish you’d like us to transform and why your dish should be chosen for All About The Kale’s Clean Redux Challenge.

We’ll pick a winner and start the revolution!


Wednesday 18 March 2015

Snigger Bars

So I had a rare evening with no plans and despite getting home late from work, decided to dedicate my last remaining hours of brain functionality to my passion. The kitchen. Snigger Bars Loosely based on the famous 'Marathon' or 'Snickers' Bar I grew up with whether it was pre-swimming practice or post-country walk snack but this time, it's better... I made mine with almonds, but feel free to use peanuts or cashews, or... any nut of your choosing!

Ingredients:

The Nutty Bit:

65g Buckwheat Flour

80 ml Agave Syrup

150g almonds (I use whole, but sliced works well!)

The Squidgy Bit:

15 dates- pitted

Water

Vanilla essence

Pinch of salt

2 tbsp of melted Coconut Oil

The Chocolatey Bit:

60ml melted cacoa butter

30g cacoa powder

60ml Agave or Maple Syrup

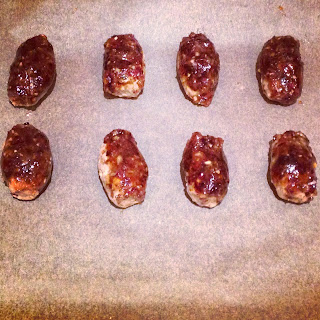
Method: Using a blender or food processor mix the flour, with the roughly chopped nuts and syrup. Grab little handfuls and roll in to shapes. Sausage shaped or balls -it's totally up to you. Place on baking parchment on a dish and whack in the freezer.
Whilst your shapes are chilling, whizz up 15 dates, a dash of vanilla essence (say 1/2tsp) and the melted coconut oil. Add water sparingly until you have a creamy caramel. I was lazy and used the larger bowl and blade on my mixer to save washing up so it was chunkier than usual! We love diversity though, so whether you like yours as smooth as cashew butter or chunkier like crunchy peanut butter, it's a-okay with us! You should be able to spread the date mixture over the chilled nutty bit. I find it is quite easy to 'roll' the spread over the nut shapes for even coverage.
Place your snigger shapes back in the freezer whilst you make your raw chocolate. It is as easy as melting the butter, stirring in the powder and the syrup. As always, feel free to swap the cacoa butter for coconut oil and swap the syrup for a sweeter of your choice, whether it maple, pomegranate, date, agave etc... Evenly coat the snigger shapes with the melted chocolate and chill again... or at least try to, before devouring.
I like to play around with the textures and consistency of these Snigger bars. Pulse the nuts a little more or less whilst making the 'nutty bit' for a smoother or crunchier texture. Likewise with the 'Squidgy Bit' date caramel.

Spinach Crisps to Start....

So we've been getting a lot of requests for our recipes on our Instagram page. Our website is under construction but to kickstart our world-takeover, one clean and healthy recipe at a time, we thought we'd get a little headstart! A super simple, super tasty, fast track snack: SPINACH CRISPS Our No.1 love, Kale has been getting a lot of press at the moment, particularly the 'crisp' (or for our American fans, 'chip') variety. Did you know that Spinach Crisps are outrageously tasty too? You can pick up a bag of Organic spinach from any supermarket for under £1.00. You'll need: Spinach Olive Oil or coconut oil Garlic chips (or powder) Salt and Pepper to taste Rinse your spinach leaves in a colander and lightly pat dry with a clean tea-towel. Place in a large bowl and drizzle with olive oil or melted coconut oil as you prefer. Lightly grind up a nice handful of garlic chips in a pestle and mortar (or if using garlic powder sprinkle away!) We do prefer garlic chips for the added crunch and bite (You can get them here ) Season with good old salt and pepper. Give the spinach, oil and garlic a stir for even coverage. Now, in order to get the crispiest crisps, you'll need to lay the leaves in a single layer on a baking tray with baking parchment.
Bake in the oven at 150c for around 7 to 10 minutes, until crispy. SNACK TIME!

Wednesday 4 March 2015

All About The Kale

Our website and blog is under construction so this is a half-way house to keep you in the loop until we can launch for REALS!! <3

"All About The Kale thanks you for your interest. Your call is important to us...please hold..." ;)